This is the second post in the series. The first part explained the ideas behind the project and the research done, while now we’re focusing on the practice.
This article contains deployment scripts and templates for deploying a MariaDB and Galera Cluster database, with 3-5 nodes running on CoreOS. In addition to the sample code, I’m also publishing a web-based generator app as open source code on GitHub that can be used to simplify the creation of the startup scripts.
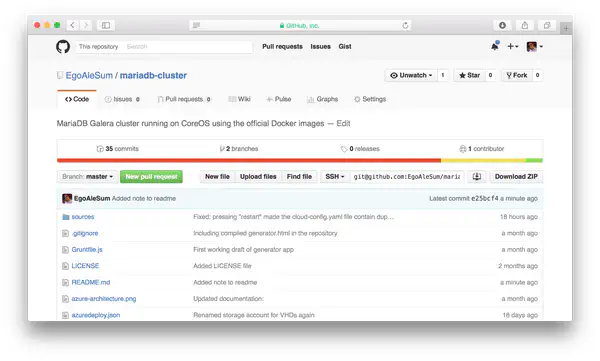
All the sample scripts and templates, as well as the “generator” app are published freely on GitHub on ItalyPaleAle/mariadb-cluster and are released under the terms of the “Unlicense” (essentially, public domain).

There are essentially two parts in this project. The first one is the Cloud Config file, which takes care of configuring the cluster inside each CoreOS node. This part is independent of the environment used, as the same file can be used on any public cloud (Azure, AWS, Google, etc) and even in private clouds.
The second part is specific to users wanting to deploy the cluster on Azure, and it provides an Azure Resource Manager (ARM) template. This is a single JSON document that describes the entire infrastructure (virtual machines, load balancers, endpoints, etc) and that can be deployed on Azure in a few click. While the Cloud Config file is used “inside” each node, this is instead used for the surrounding infrastructure. The ARM template created with the generator app includes the Cloud Config file to set up all virtual machines, so it’s essentially an all-around solution for users of the Azure cloud.
Systemd units
Systemd is the replacement of the old SysV Init that ships with almost all modern Linux distributions. On CoreOS, it’s one of the most common ways to manage containers; in particular, in our case Systemd takes care of: pulling the latest version of the MariaDB official image from the Docker Hub, launching the container as daemon, and restarting failed containers.
There are two key Systemd units in this project:
- docker-mariadb-galera (unit file and bash script): This unit spins up the Docker containers, following all the procedure explained in the first part of this blog post. On the initial bootstrap, when the database is created, the first node launches immediately and starts up the cluster. All the other nodes have to wait for the first one to be initialized (using etcd2 for the semaphore).
- docker-mariadb-waiter (unit file and bash script): This unit is necessary for the initial database cluster bootstrap. It waits for the first node to complete the initialization, and then updates the status of the semaphore in etcd2 so the other machines can launch the MariaDB container and connect them to the cluster.
Cloud Config
The Cloud Config file is a declarative YAML document that is standard on CoreOS for node initialization; the official OS documentation is a good article to check out if you want to become more familiar with this technology.
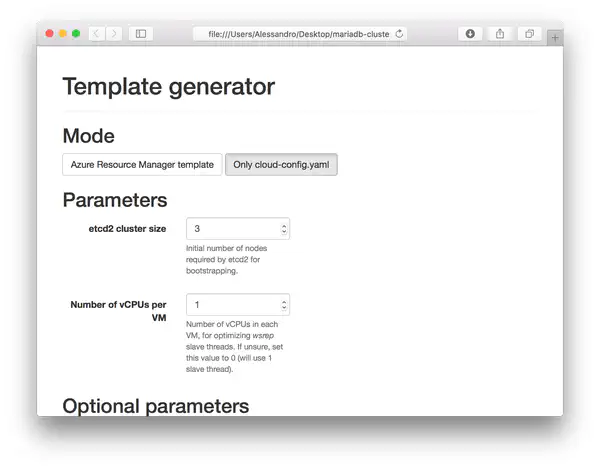
You can generate a custom cloud-config.yaml for this MariaDB and Galera Cluster setup using the web-based generator app on the GitHub repository. Clone the repository locally, then open the generator.html file with any modern browser (Edge, Chrome, Firefox, Safari) and choose “Only cloud-config.yaml” as operation mode.

The resulting Cloud Config file will:
- Enable etcd2 (with a new “discovery URL” requested for you by the generator app)
- Enable automatic updates for CoreOS
- Install the required Systemd units presented above to have the MariaDB cluster start up, copying all the required bash scripts and configuration files
The generated file will look similar to this (the full contents of the scripts have stripped for clarity in this post; you can find links to the code on GitHub below):
#cloud-config
coreos:
  update:
    reboot-strategy: etcd-lock
  etcd2:
    discovery: 'https://discovery.etcd.io/ca0061265ac2d328d0f0e5bfcaba3cd4'
    advertise-client-urls: 'http://$private_ipv4:2379,http://$private_ipv4:4001'
    initial-advertise-peer-urls: 'http://$private_ipv4:2380'
    listen-client-urls: 'http://0.0.0.0:2379,http://0.0.0.0:4001'
    listen-peer-urls: 'http://$private_ipv4:2380'
  units:
    - name: etcd.service
      command: stop
      mask: true
    - name: docker.service
      command: start
    - name: etcd2.service
      command: start
    - name: docker-mariadb-galera.service
      command: start
      content: "[...]" # Content of docker-mariadb-galera.service
    - name: docker-mariadb-waiter.service
      command: start
      content: "[...]" # Content of docker-mariadb-waiter.service
    - name: etcd-waiter.service
      command: start
      enable: true
      content: "[...]" # Content of etcd-waiter.service

write_files:
  - path: /opt/bin/docker-mariadb-galera.sh
    owner: root
    permissions: '0755'
    content: "[...]" # Content of docker-mariadb-galera.sh
  - path: /opt/bin/docker-mariadb-waiter.sh
    owner: root
    permissions: '0755'
    content: "[...]" # Content of docker-mariadb-waiter.sh
  - path: /opt/bin/etcd-waiter.sh
    owner: root
    permissions: '0755'
    content: "[...]" # Content of etcd-waiter.sh
  - path: /opt/mysql.conf.d/mysql_server.cnf
    owner: root
    permissions: '0644'
    content: "[...]" # Content of mysql_server.cnf
Linked files:
docker-mariadb-galera.service
docker-mariadb-galera.sh
docker-mariadb-waiter.service
docker-mariadb-waiter.sh
etcd-waiter.service
etcd-waiter.sh
mysql_server.cnf
A few notes about using the generated Cloud Config file:
- The Cloud Config file generated is meant to be used with CoreOS 899+; it has not been tested with any other Linux distribution, and it’s likely not to work.
- With these scripts, you can deploy up to 5 nodes in the cluster, and your nodes must be named
mariadb-node-0,mariadb-node-1, etc, untilmariadb-node-4. All VMs in the cluster must be able to connect to each other using those names, so you need to ensure that a naming resolution service exists in your infrastructure. Indeed, in the current version, the MariaDB configuration file has hardcoded the hostnames of the VMs; however this design choice may change in the future. - It’s strongly advised to use an odd number of nodes to avoid the risk of “split-brain conditions” (please see the official Galera documentation).
- The default password for the
rootuser in the database ismy-secret-pw; it’s recommended to change it as soon as possible.
Azure Resource Manager template
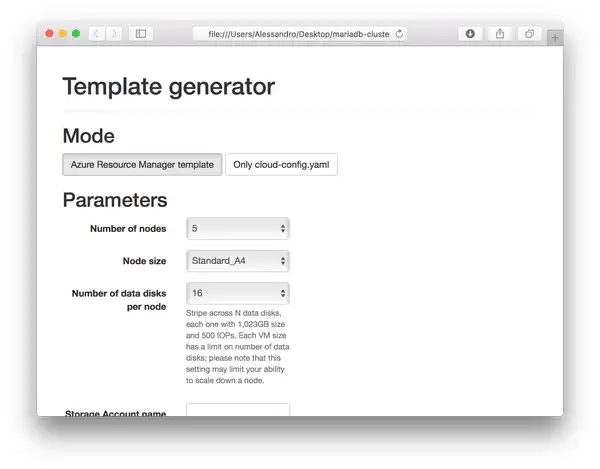
When using the generator app in the “Azure Resource Manager template” mode, in addition to the Cloud Config file you will get also a JSON document describing your infrastructure.
As in the previous case, clone the GitHub repository locally, then open the generator.html file with any modern browser (Edge, Chrome, Firefox, Safari) and choose “Azure Resource Manager template” as operation mode.

How to deploy the template
- Ensure you have an active Azure subscription. You can also get a free trial.
- Using the
generator.htmlpage in your machine, create the Azure Resource Manager template, properly configured. - Open the Azure Portal, then press “+ New” on the top left corner, search for “Template deployment” and select the result with the same name. Then click on the “Create” button.
- In the “Template” blade, paste the “Azure Resource Manager template” JSON document generated with the HTML app.
- In the “Parameters” blade, leave all values to their default (the JSON you pasted has all your parameters already hardcoded as default values).
- Select the subscription you want to deploy the cluster into, then create a new Resource Group (or choose an existing one) and pick in what Azure region you want the deployment to happen. Lastly, accept the mandatory legal terms and press Create.
- Azure will deploy your VMs and linked resources, and then MariaDB and Galera Cluster will be started in all the VMs automatically. The duration of the setup depends a lot on the size of the attached disks; with small disks (2-4), it should last around 5 minutes.
Architecture of deployment on Azure
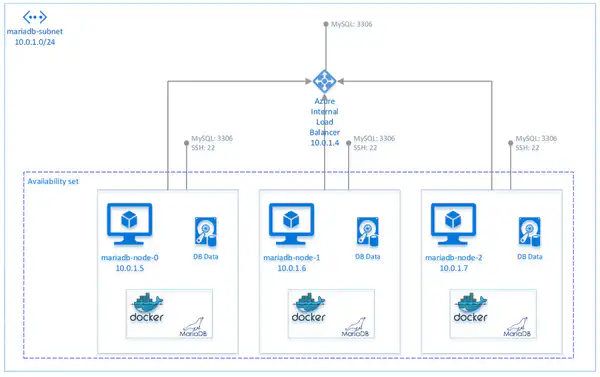
On the Microsoft Azure platform, the JSON template is deploying the following:

- A Virtual Network named after the Resource Group (not in the diagram) with address space
10.0.0.0/16. - A subnet
10.0.1.0/24namedmariadb-subnet. - An Azure Internal Load Balancer for the MySQL endpoints (port
3306). The Internal Load Balancer has always the address10.0.1.4and no public IP. - The 3 or 5 nodes running the application. All VMs are named
mariadb-node-N(where N is a number between 0 and 4), with addresses automatically assigned by DHCP (generally, the first one to deploy obtains10.0.1.5, and the others follow in sequence). Nodes do not have a public IP, and Network Security Group rules allow traffic only to ports 3306 (MySQL) and 22 (SSH), and only from within the Virtual Network. All VMs are also deployed in an Availability Set, in order to achieve high availability.
Your application can connect to the MariaDB Galera Cluster on the IP 10.0.1.4 (Internal Load Balancer) on port 3306. Using Network Security Group rules, connections to the database are allowed only from within the Virtual Network. Connecting to the cluster using the IP of the Internal Load Balancer is recommended because it handles failover automatically; however, it’s still possible to connect to individual nodes directly, for example for debug purposes. In case you need to administer the VMs using SSH, you can do so by connecting to each instance on port 22, from another machine inside the Virtual Network, and authenticating using the public key method.
The default password for the root user in the database is my-secret-pw; it’s recommended to change it as soon as possible, using the following SQL statement:
SET PASSWORD FOR 'root'@'%' = PASSWORD('newpass');
Note: when in “Cloud Config mode”, the generated YAML file is slightly different than the one generated in “Azure Resource Manager template” mode. In the latter case, a few more units and scripts are added to attach and format data disks attached to the Azure Virtual Machines.
Notes on parameters for the generator
etcd2 Discovery URL
An optional parameter in the generator app is the Discovery URL for etcd2. etcd2 is a distributed key/value storage that is shipped with CoreOS and on which the deployment scripts in this repository rely on.
Most users should leave the Discovery URL field empty. When the field is not set, the generator app will request a new Discovery URL automatically on your behalf, using http://discovery.etcd.io/. You will need to manually set a value for this field if you are re-deploying the template in an existing, running cluster.
SSH key
The generator app requires you to specify a SSH RSA public key.
Linux and Mac users can use the built-in ssh-keygen command line utility, which is pre-installed in OSX and most Linux distributions. Execute the following command, and when prompted save to the default location (~/.ssh/id_rsa):
ssh-keygen -t rsa -b 4096
Your public key will be located in ~/.ssh/id_rsa.pub.
Windows users can generate compatible keys using PuTTYgen, as shown in this article. Please make sure you select “SSH-2 RSA” as type, and use 4096 bits as size for best security.