I have been a happy pfSense user for over three years, with my home networking currently running on a Netgate SG-3100 (with a power-efficient ARM chip).
All was good, until a few days back it just crashed.
My @pfsense firewall decided to die all of a sudden. During work hours.
— Ale(ssandro) Segala (@ItalyPaleAle) August 22, 2019
Somehow its configuration got corrupted and it stopped working. Tried rebooting and it just wouldn't boot.
No Internet. Total panic right now.
I’m exactly sure how that happened. I had just applied an innocuous change (adding a new firewall rule), and everything just blew up. Most firewall rules got disabled, the DNS server stopped working, VPNs got disconnected… All suddenly and mysteriously. What I realized was that the internal state had somehow got corrupted, and when I applied the new firewall rule, the system started acting up.
Nothing I attempted seemed to work, as the UI wouldn’t let me restore a configuration, and I was getting errors everywhere. So, I tried rebooting it.

Everyone knows turning it off and on again always works. Except, this time it didn’t. The firewall wouldn’t boot up anymore.
Ouch.
There was only one thing left to do: a full restore of the OS. Thankfully, I had a backup of the configuration (I was actually able to download it from the firewall before rebooting - it was the only thing that worked).
Of course, being without a working firewall means, for most people, having no Internet connection at all. And that is stressful: how can you fix your Internet if you have no Internet? If you’re reading this because your pfSense box has crashed too, for whatever reason, I hope this guide can help you panic less.
Step 0: Gather what you need
There are a few things you’ll need.
First: download the OS image of pfSense 2.x. If you’re using the Community Edition, you can download it from the pfSense website - make sure to fetch the “memstick” version for the right type of console (“vga” if you have a screen; otherwise, “serial”). If you have a Netgate appliance, you might need to open a ticket with them to get one (if you have an ARM-based device like the Netgate SG-3100, this is the only way to get the image).
Second: you’ll need a USB drive of at least 2GB. The contents of this drive will be completely deleted. If you are using an amd64 image, then you’ll need a second USB drive, formatted as FAT32.
Third: you’ll need a way to interact with the device.
- If your device has a video port, connect it to a display and attach a keyboard (no mice needed).
- If your device doesn’t have a video port (like my Netgate appliance), you can use the serial console. For that, you’ll need a USB cord to connect it to your laptop. For the SG-3100 and other Netgate appliances I have experience with, that’s USB type-A to mini-USB, like this one on Amazon (not an affiliated link).
Lastly, you will need a backup file, un-encrypted in XML format. Without it, you can still re-install pfSense, but you’ll need to re-configure your firewall from scratch.
If you don’t have a backup file, all might not be lost. If you’re able to boot the firewall, you can try exporting the configuration (assuming it’s not corrupted) through the serial console and save it on a USB stick. See the official documentation.
Step 1: Write the OS image to the USB drive
After downloading the OS image (and uncompressing the gzip file), the easiest way to write it to the USB disk is to use a tool like balenaEtcher, available for free on Windows, Linux and macOS.
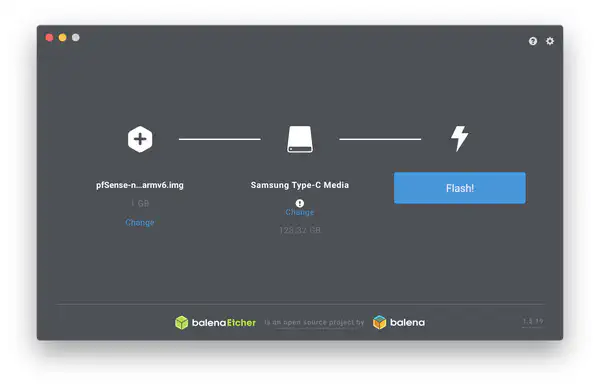
On Linux and macOS, you can also use dd from the terminal. For example, if your (uncompressed) image file is pfSense-netgate-memstick-serial-2.4.4-RELEASE-p3-amd64.img:
On Linux:
# Replace /dev/sdXX with the path to the drive
# You can check the drive path with `lsblk`
sudo dd if=pfSense-netgate-memstick-serial-2.4.4-RELEASE-p3-amd64.img of=/dev/sdXX bs=4M
On macOS:
# Replace /dev/rdiskX with the path to the drive
# You can check the drive number with `diskutil list`
sudo dd if=pfSense-netgate-memstick-serial-2.4.4-RELEASE-p3-amd64.img of=/dev/rdiskX bs=4m
Step 2: Add the backup file to the USB drive
pfSense can automatically restore the configuration from the XML backup file.
After writing the installer image to the USB drive, you might see a FAT32 partition (should be called FATRECOV). If you do see this partition (as in the ARM-based image), place the backup file in the root of that drive and call it config.xml.
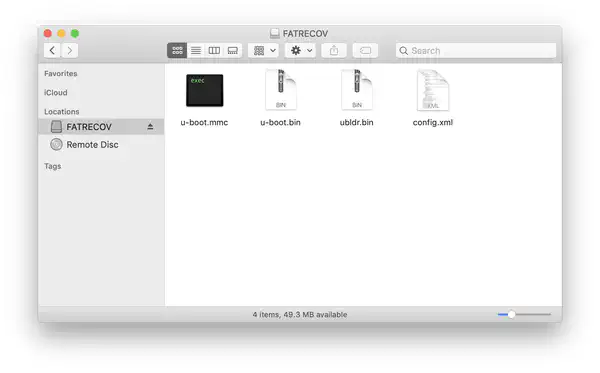
If you do not see a FAT32 partition, you will need another USB drive formatted as FAT32. Copy the backup file, named config.xml in that drive, in the root folder.
Safely eject the USB disk(s) to proceed with the installation.
Step 3: Connect to the firewall via serial console
If you were able to connect a screen and a keyboard to your firewall and can control the unit that way, you can skip this step.
Most Netgate units I’ve experience with have a serial console that’s accessible via USB. You’ll need to connect the mini-USB plug into the port on the firewall, and the other end to your laptop.
Then, connecting to the serial console is different depending on the OS.
Linux
You’ll need the screen application installed, if you don’t have it already; most distributions should have it available in their repositories.
Open the terminal and run:
sudo screen /dev/ttyUSB0 115200
If the command above fails, try a different device for the serial console. Other values could be /dev/ttyUSBx or /dev/ttySx (where x is a number, starting from 0).
macOS
You’ll need to open the terminal and run this command:
screen /dev/cu.SLAB_USBtoUART 115200
Windows
On Windows, you need to use PuTTY, which is available as a free download.
In the “Sessions” screen, you’ll need to configure PuTTY to connect to the COM port of your serial line (you can use Device Manager to view the precise number), set speed 115200, and connection type “Serial”.
I’ll refer you to the official documentation for more detailed instructions.
Step 4: Reinstall pfSense
Plug the USB drive with the installer into your firewall, then reboot it (if you can’t reboot it via software, unplug the firewall and then power it back up).
The next two instructions apply to my SG-3100. If your firewall has a different firmware, you might need to boot up the pfSense installer in another way.
Once the firmware console appears, hit any key to stop the “autoboot”.
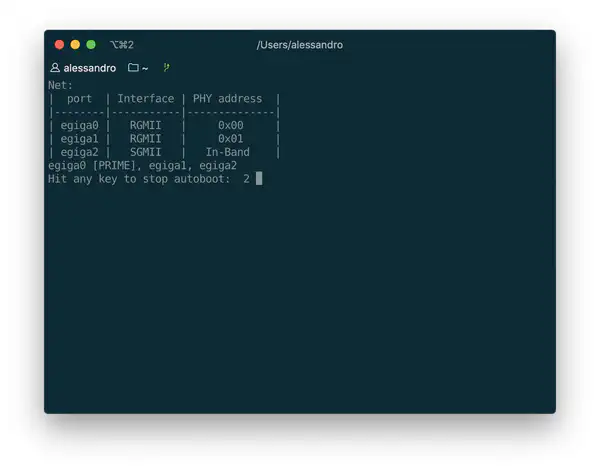
You’ll find yourself in the firmware’s shell. Type run recovery and press return to start the installer.
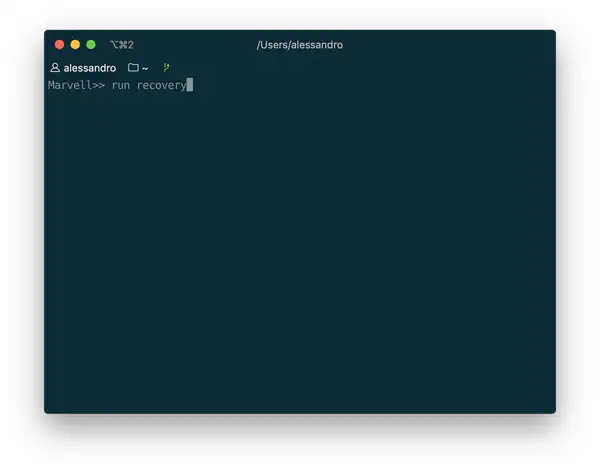
The rest of the instructions below should be identical or very similar regardless of your firewall’s model.
Once the installer has booted up, it will ask you where to install pfSense. The default choice should be the right one for most users, so just press return.
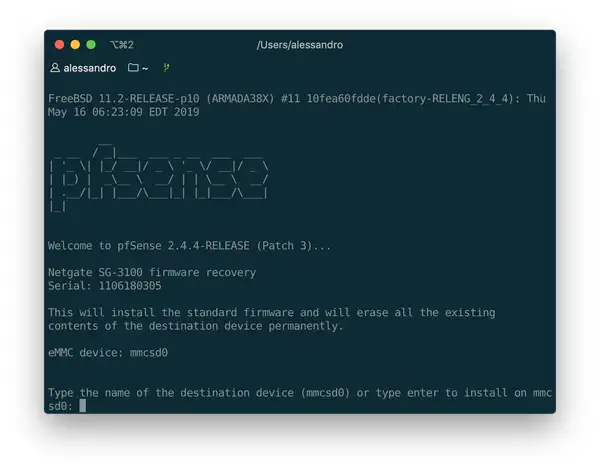
Then confirm with y and return. The installer will take a few minutes.
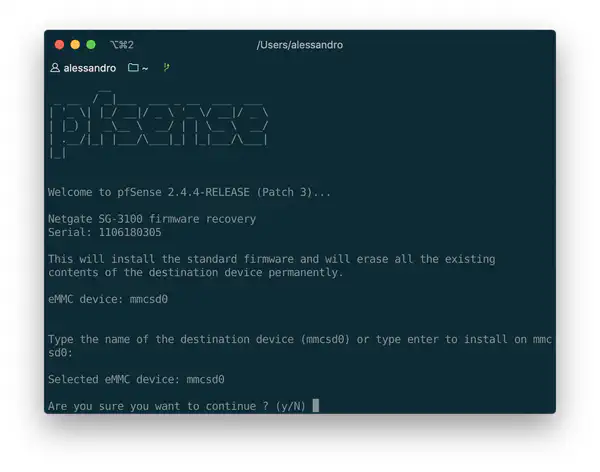
Step 5: Reboot and restore the configuration
Once the installation is over, you’ll get a message asking you to reboot the system. Press any key in the serial console to reboot it.
Before you reboot, make sure that the drive containing the config.xml file is attached. If it’s in the same USB drive as the installer, don’t remove the install media. If it’s on a separate drive, switch the USB stick.
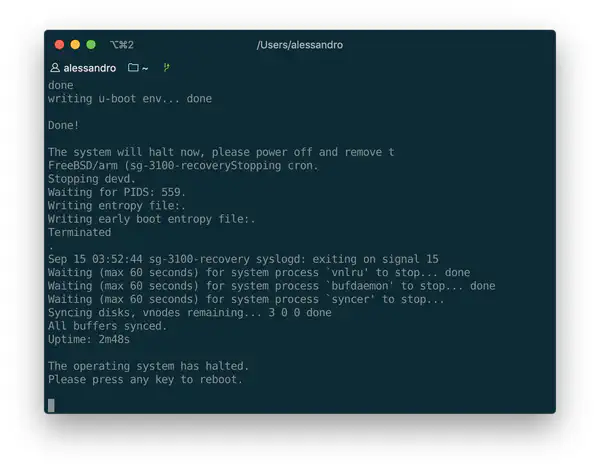
The firewall will now restart. Once it’s up, if you had copied a config.xml file in the USB drive, it will automatically restore the configuration of pfSense. Note that add-on packages are reinstalled in the background and it might take a few minutes for them to be restored.
After you see the pfSense menu, you can safely remove the USB drive and the disconnect from the serial console.
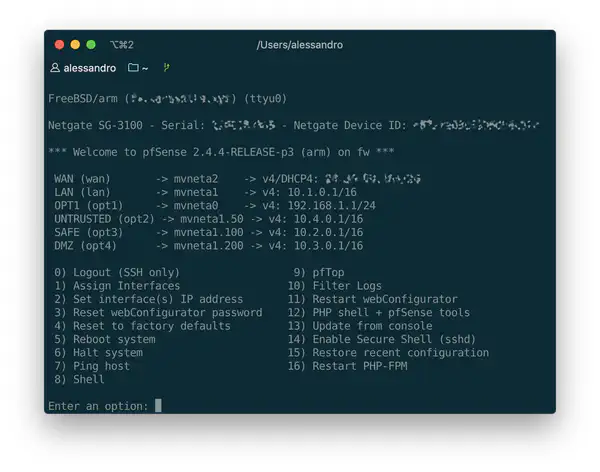
Your firewall should now be up and running.