
This article has been updated on November 14, 2021 for Raspbian Bullseye and for Docker Compose v2.
At the end of May 2020, the Raspberry Pi Foundation announced Raspberry Pi OS, the new official operating system for the mini-computer that is replacing Raspbian.
The announcement also came with the news that Raspberry Pi OS is now available in a 64-bit variant, compatible with Raspberry Pi 3 and 4. This is in addition to the 32-bit variant that has been maintained since the early days.
For the first time, users of the Raspberry Pi boards can enjoy a 64-bit operating system that is officially developed and supported by the Foundation itself. This is particularly great news especially for developers, people who are self-hosting services, and just tinkerers.
The good news is that Raspberry Pi OS does support Docker, in both the 32-bit and 64-bit variants! Read below on how to install it as well as Docker Compose.
Note: This article is written for Raspberry Pi boards version 2, 3, and 4 running Rasperry Pi OS, as well Raspberry Pi Zero 2 and the Raspberry Pi 400 units. Older models of the board and the first-generation Raspberry Pi Zero are not supported.
Additionally, if you are using a different distribution for your board besides the official Raspberry Pi OS, the instructions below are not guaranteed to work for you.
Choosing the right version of Raspberry Pi OS
You can download the images for Raspberry Pi OS from the official website.
As of writing, images for the 64-bit variant are still in beta and can be found here.
Once you have downloaded the IMG file (which is compressed, so unzip it first) you can use the Raspberry Pi Imager to write the operating system in a SD card.
As for which image to choose, Docker works on all variants and editions of Raspberry Pi OS.
32-bit vs 64-bit
The 32-bit edition of Raspberry Pi OS will run on every board, including Raspberry Pi 2.
If you have a Raspberry Pi 3, 4, or 400, as well as the Raspberry Pi Zero 2, you have the opportunity to pick the 64-bit variant too. Using a 64-bit operating system will give you better performance and it’s required to take advantage of the full amount of memory of the 8GB Raspberry Pi 4 board.
The variant you pick will affect the Docker images you’ll be able to run. We’ll look into that below.
Desktop vs Lite
As the names suggest, the Desktop edition comes with a graphical user interface and the ability to run desktop apps. The Lite edition is headless, offering only access to the command line.
Both editions of Raspberry Pi OS can run Docker.
If you plan to use your Raspberry Pi as a headless server, pick the Lite edition to save disk space and reduce memory usage (and have a smaller potential attack surface). You will be able to control the server remotely via SSH.
Installing Docker
Installing Docker CE (Community Edition) on the Raspberry Pi OS requires running just a few commands.
The best way to install Docker is to fetch it from the official Docker repositories, so to ensure that you’re always running the latest version.
To install Docker CE on Raspberry Pi OS, both 32-bit and 64-bit, run:
# Install some required packages first
sudo apt update
sudo apt install -y \
     apt-transport-https \
     ca-certificates \
     curl \
     gnupg2 \
     software-properties-common

# Get the Docker signing key for packages
curl -fsSL https://download.docker.com/linux/$(. /etc/os-release; echo "$ID")/gpg | sudo apt-key add -

# Add the Docker official repos
echo "deb [arch=$(dpkg --print-architecture)] https://download.docker.com/linux/$(. /etc/os-release; echo "$ID") \
     $(lsb_release -cs) stable" | \
    sudo tee /etc/apt/sources.list.d/docker.list

# Install Docker
sudo apt update
sudo apt install -y --no-install-recommends \
    docker-ce \
    cgroupfs-mount
Done! At this point, we just need to run two more commands to have the Docker service started and automatically launched at boot.
sudo systemctl enable --now dockerNow that we have Docker running, we can test it by running the “hello world” image:
sudo docker run --rm hello-worldIf everything is working, the command above will output something similar to:
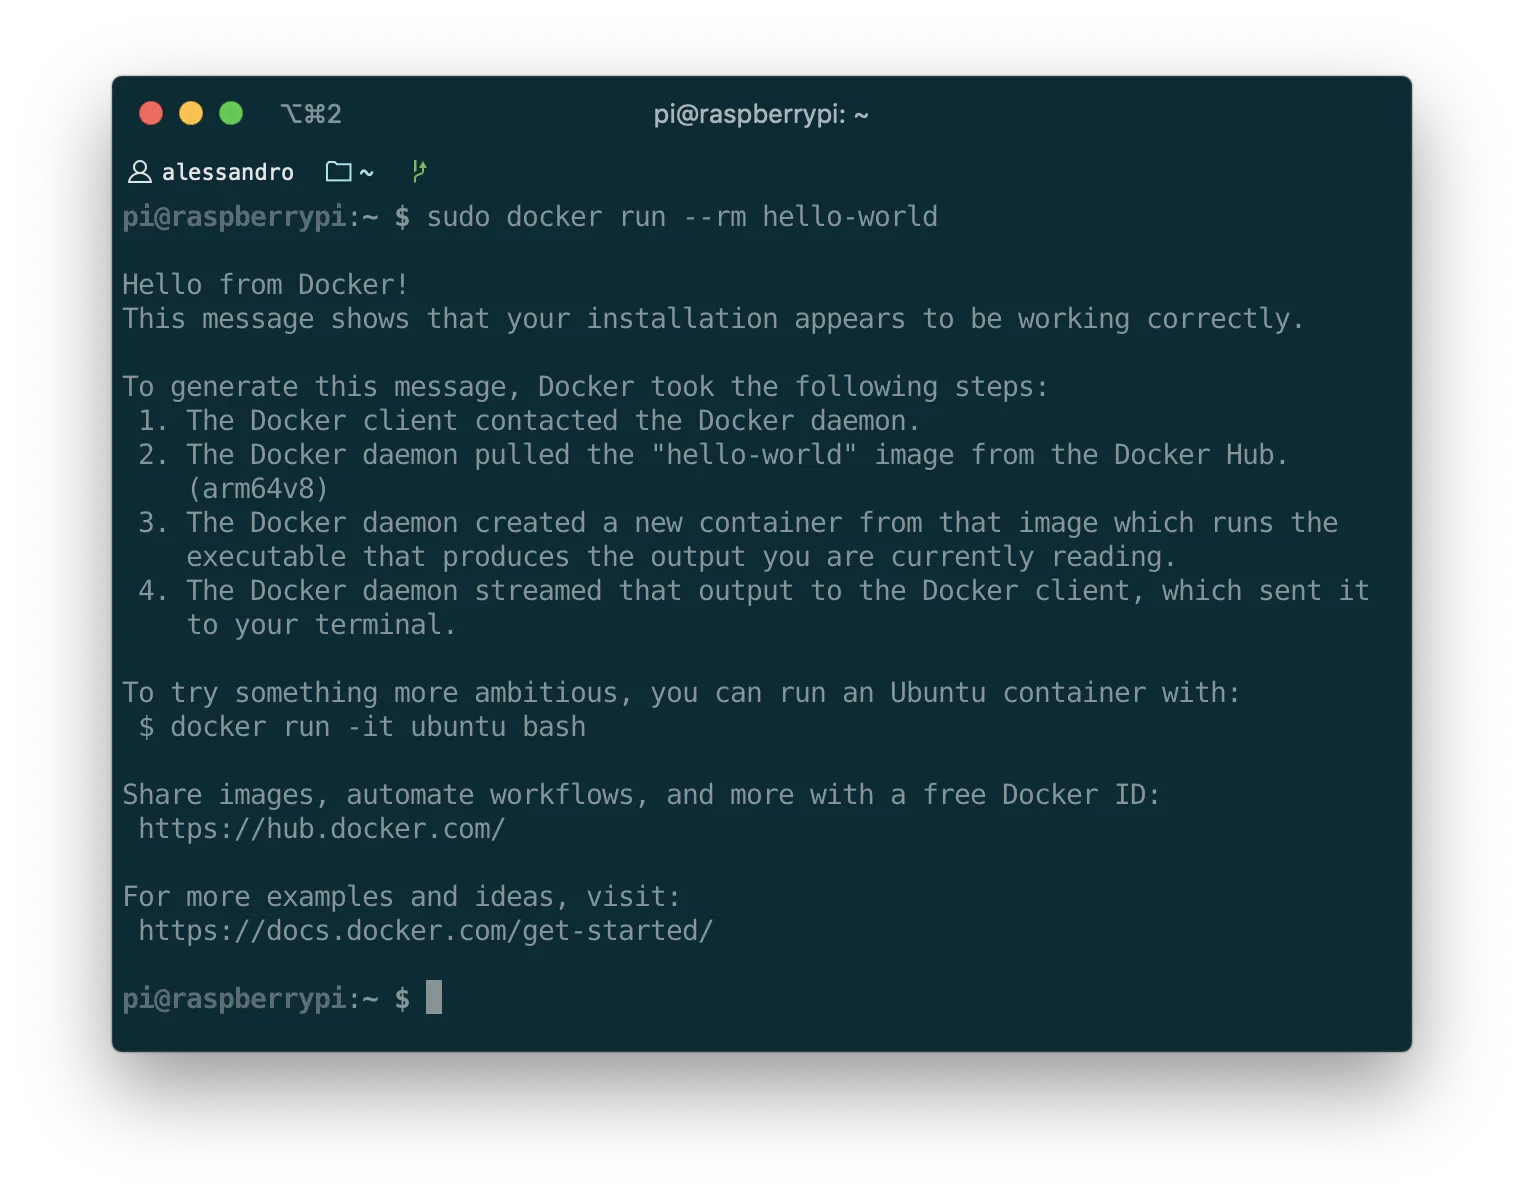
Docker images for 32 and 64 bit ARM
On Docker Hub, the number of images for the ARM architecture used by the Raspberry Pi is growing by the day. Even though the majority of images are still only available for the x86 architecture (used by Intel and AMD CPUs, for example), the amount of ARM-compatible images is increasing steadily.
Additionally, because of the growing popularity of 64-bit ARM in certain cloud providers, it might be especially easier to find 64-bit Docker containers.
When searching for an image on Docker Hub, you can filter by operating system and architecture, where “ARM” refers to the 32-bit variant.
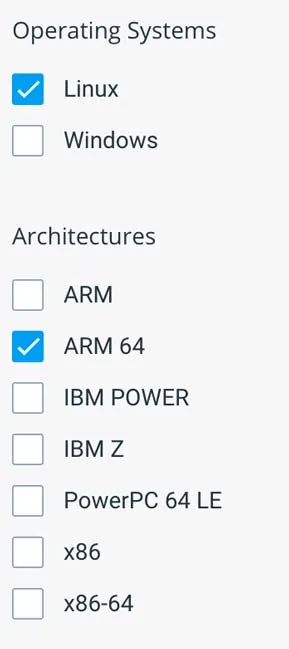
In the Docker ecosystem, 64-bit ARM images are called arm64 or arm64/v8.
Likewise, 32-bit images for Raspberry Pi OS are labeled as armhf, armv7, or arm/v7.
Using Docker Compose
Lastly, let’s look at how to add Docker Compose.
As of Docker Compose v2, the application does not have a dependency on Python, and pre-built binaries are available for all ARM-based systems.
First, find the latest version from the releases page; as of writing, that is 2.1.1. Then run these commands:
# Replace with the latest version from https://github.com/docker/compose/releases/latest
DOCKER_COMPOSE_VERSION="2.1.1"
# For 64-bit OS use:
DOCKER_COMPOSE_ARCH="aarch64"
# For 32-bit OS use:
DOCKER_COMPOSE_ARCH="armv7"

sudo curl -L "https://github.com/docker/compose/releases/download/v${DOCKER_COMPOSE_VERSION}/docker-compose-linux-${DOCKER_COMPOSE_ARCH}" -o /usr/bin/docker-compose
sudo chmod +x /usr/bin/docker-compose
With this, you now have a complete Raspberry Pi mini-server running Docker and ready to accept your containers.