
If you run servers with ZFS, especially in a homelab, you’ve probably had to make peace with an awkward trade-off around disk encryption. ZFS native encryption is great: it protects data at rest, the compression and dedup machinery still work above the encryption layer, and you can encrypt individual datasets. The hard part has never been enabling encryption: the hard part is figuring out where to keep the key.
There are two common approaches to managing the encryption key for ZFS datasets, and neither one is fully satisfying.
The first is to require an admin to type the passphrase via SSH every time the server boots. This is reasonably secure, since the key never lives on the machine, but it makes unattended reboots painful. If your server crashes at 3am while you’re traveling, your data stays offline until you can find a laptop and a network. It also nudges people toward picking passphrases they can actually remember and type from a phone keyboard, which usually means picking weaker ones.
The second approach is to drop the key in a plaintext file on a separate, unencrypted partition, and have ZFS read it at boot. The disks themselves stay encrypted at rest, so you’re protected if you sell or dispose of the hardware. However, anyone who walks off with the machine, or who can read that partition, gets the key for free. For some threat models that’s fine, but this isn’t really encryption in any meaningful sense, just disposal hygiene.
What I really wanted was a setup where the encryption key is never stored in plaintext on the server, where I don’t have to SSH in to unlock anything, and where I can approve unlocks from my phone, anywhere. That’s the gap I built Revaulter to fill, and what I want to walk through here is exactly how I use it to unlock ZFS datasets at boot.
What Revaulter is, briefly
I’ve been using Revaulter for a few years to keep secrets out of disk and out of environment variables, and earlier this month I shipped v2, which is almost a complete rewrite. The biggest change in v2 is that Revaulter now uses Passkeys (WebAuthn with the PRF extension) to derive encryption keys directly in the browser. The previous version relied on Azure Key Vault as the key custodian, which worked but was significantly more complex to operate.
At a high level, the model is:
- A script on your server calls
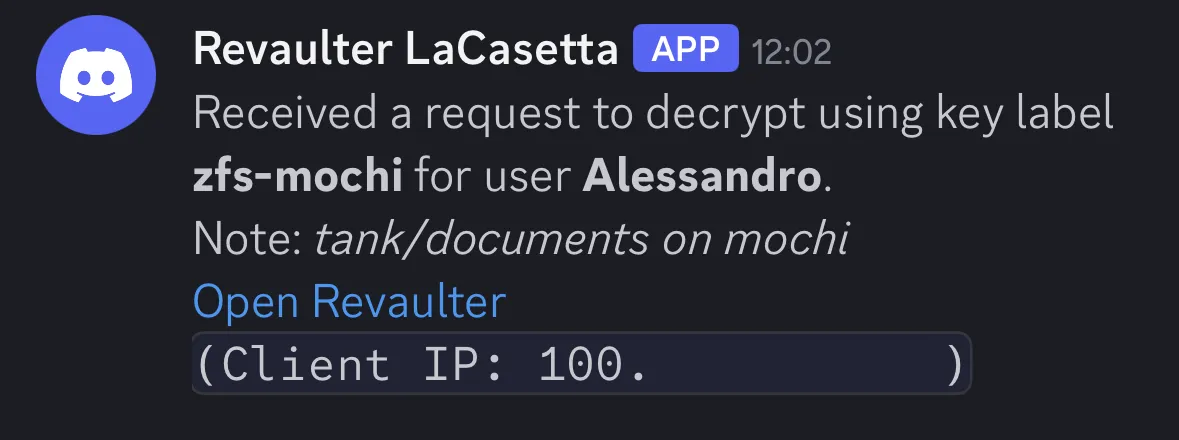
revaulter-clito ask for an encrypt or decrypt operation - Revaulter sends you a webhook notification (Discord, Slack, or any HTTPS endpoint)
- You open the web UI on your laptop or phone
- You authenticate with your passkey and approve the request
A few things worth mentioning for those that are more curious about the encryption scheme; the full details are in the cryptography architecture doc.
- The browser performs the actual cryptographic operation locally, using a key derived from your passkey, and the result is sent back to the CLI End-to-End Encrypted (E2EE). The Revaulter server itself never sees plaintext, and never holds the keys.
- The encryption key for each operation is derived deterministically from a 32-byte primary key that’s generated in your browser at signup and stored on the server only in wrapped form, with the wrapping key derived from your passkey’s PRF output. (This allows having multiple passkeys, such as two YubiKey’s)
- Application data is encrypted with AES-256-GCM (or ChaCha20-Poly1305), and the transport between the CLI and the browser is hybrid: classical P-256 ECDH combined with ML-KEM-768, so the response envelope is post-quantum-secure even though most passkeys today don’t yet support post-quantum primitives themselves.
- You can optionally add a password as a second factor on top of the passkey for a second factor (especially if you’re concerned with your passkey not using post-quantum crypto).
For the ZFS use case, the experience we care about is:
- When an encrypted dataset is created, we generate a random 32-byte key, ask Revaulter to wrap (encrypt) it, and write the wrapped envelope to a file on an unencrypted partition of the server.
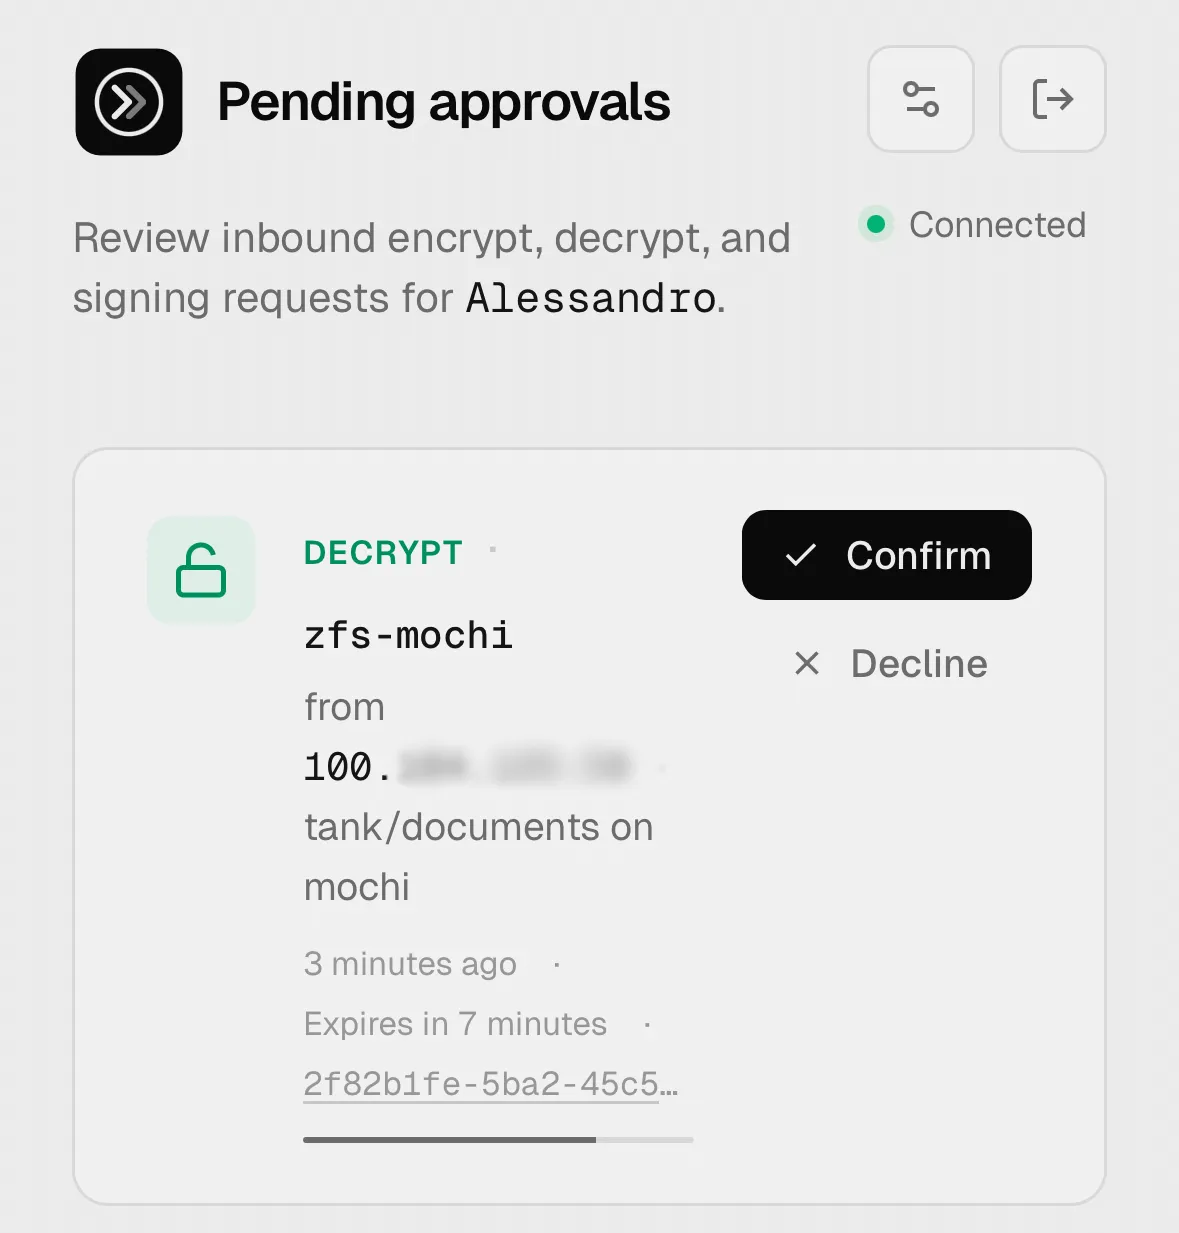
- At boot, a systemd unit reads that envelope and asks Revaulter to unwrap it. You get a notification on your Slack/Discord/etc, approve the request with your passkey, and the unwrapped key is piped straight into
zfs load-key. The plaintext key never touches disk, and never lives in memory longer than the moment ZFS needs it.
Setting up the Revaulter server
The first thing you need is a running Revaulter server somewhere reachable from your servers. The quickstart covers this in full, but the gist is a tiny Docker Compose file:
# docker-compose.yml
services:
  revaulter:
    image: ghcr.io/italypaleale/revaulter:2
    ports:
      - "8080:8080"
    volumes:
      - ./config.yaml:/etc/revaulter/config.yaml:ro
      - ./data:/data
    restart: unless-stopped
And a minimal config.yaml:
databaseDSN: "/data/revaulter.db"
secretKey: "<generate with: openssl rand -base64 32>"
baseUrl: "https://revaulter.example.com"
webhookUrl: "https://discord.com/api/webhooks/..."
You’ll want to put it behind a TLS-terminating reverse proxy (Traefik, Caddy, nginx, etc - this is required because we use WebAuthn and WebCrypto) and make sure the public URL matches baseUrl. The webhookUrl is what gets pinged when a request is waiting for approval: a private Discord channel works really well because the notification arrives on your phone shortly after.
After the server is up, open the web UI of your Revaulter instance, register an account, and pair your passkey. You’ll get a per-user request key in the UI, which is a non-secret identifier the CLI uses to address requests to your account. Keep this handy, as we’ll use it in all the commands below.
For the rest of this walkthrough, I’m going to assume two environment variables are set in your shell:
# Address of your Revaulter server
REVAULTER_SERVER="https://revaulter.example.com"
# Your request key, copied from the web UI
REVAULTER_REQUEST_KEY="..."
Installing the CLI on the server
The CLI ships as a self-contained Go binary: you can grab the latest release for your architecture from the releases page. Drop it somewhere in your server, e.g. /usr/local/bin/revaulter-cli. Alternatively, there’s also a container image at ghcr.io/italypaleale/revaulter-cli:2 if you’d rather run it with Docker.
We also need to pin the Revaulter’s anchor keys locally, so we can run shell commands non-interactively. This is an extra layer of protection to ensure the Revaulter CLI is talking to the right server and user.
# Ensure the directory exists
mkdir -p /etc/revaulter/cli
chmod 0700 /etc/revaulter/cli

revaulter-cli trust \
  --server "$REVAULTER_SERVER" \
  --trust-store /etc/revaulter/cli/trust.json \
  --request-key "$REVAULTER_REQUEST_KEY"
Wrapping the dataset key
Now we generate the actual encryption key for our ZFS dataset, wrap it with Revaulter, and store the wrapped JSON envelope on disk. The plaintext key only exists for the duration of this one shell pipeline, and is never written to disk in the clear.
# Name of the ZFS dataset to create
DATASET_NAME="tank/data"

# Name of the existing zpool which contains the dataset
ZPOOL_NAME="tank"

# Path where the wrapped key for the dataset is stored
JSON_KEY_FILE="/etc/revaulter/keys/$DATASET_NAME.json"

# Key label - this is arbitrary and lets you keep distinct sub-keys for different purposes
# Here we name it "zfs-<server hostname>"
REVAULTER_KEY_LABEL="zfs-$(hostname)"

# Additional authenticated data, helps with key binding (optional, but a good idea)
REVAULTER_AAD="$(hostname):$DATASET_NAME"

# Ensure the directory exists
mkdir -p "/etc/revaulter/keys/$(dirname "$DATASET_NAME")"
chmod 0700 "/etc/revaulter/keys/$(dirname "$DATASET_NAME")"

# Generate a random 32-byte key and wrap it with Revaulter
# The key is encoded as 64 hex chars, for ZFS keyformat=hex
openssl rand -hex 32 \
  | revaulter-cli encrypt \
     --server "$REVAULTER_SERVER" \
     --request-key "$REVAULTER_REQUEST_KEY" \
     --trust-store /etc/revaulter/cli/trust.json \
     --algorithm "aes-256-gcm" \
     --key-label "$REVAULTER_KEY_LABEL" \
     --input - \
     --aad "$(echo -n "$REVAULTER_AAD" | base64 -w0)" \
     --note "ZFS dataset $DATASET_NAME" \
     --format json \
  > "$JSON_KEY_FILE"
When you run the command, you’ll get a notification via the configured webhook. Open the Revaulter UI, authenticate with your passkey, and approve the request. The CLI will block until you do, then write the JSON envelope to $JSON_KEY_FILE. The contents look something like {"value": "...", "nonce": "...", "tag": "...", "additionalData": "..."}, where the value is encrypted. It’s fine to store this file in a non-encrypted partition.
The unlock script
Next we need a small script that, given the wrapped envelope, asks Revaulter to unwrap it and prints the plaintext key on stdout. This is what systemd will invoke at boot.
# Ensure the directory exists
mkdir -p "/etc/revaulter/unlock/$(dirname "$DATASET_NAME")"
chmod 0700 "/etc/revaulter/unlock/$(dirname "$DATASET_NAME")"

cat <<EOT > "/etc/revaulter/unlock/$DATASET_NAME.sh"
#!/bin/bash
set -e

# Wait for the Revaulter server to be reachable
while ! curl -s "$REVAULTER_SERVER/healthz" > /dev/null; do
    >&2 echo "Waiting for the Revaulter server"
    sleep 3
done

# Sleep for a small random interval to avoid hitting rate-limiting when several units start at once
sleep \$[ ( \$RANDOM % 3 )  + 1 ]s

# Submit the decryption request and write the plaintext key to stdout
cat "/etc/revaulter/keys/$DATASET_NAME.json" \\
  | revaulter-cli decrypt \\
     --server "$REVAULTER_SERVER" \\
     --json - \\
     --request-key "$REVAULTER_REQUEST_KEY" \\
     --trust-store /etc/revaulter/cli/trust.json \\
     --note "ZFS dataset $DATASET_NAME" \\
     --format raw
EOT

chmod 0500 "/etc/revaulter/unlock/$DATASET_NAME.sh"
The request key is baked into the script, which is fine: it’s not a particularly high-value secret. It identifies whose approval is needed, but on its own it doesn’t grant the ability to decrypt anything, which still requires my passkey on your phone.
Creating the encrypted dataset
With the unlock script ready, we can finally create the ZFS dataset. ZFS reads the key from stdin when keylocation=prompt, so we just pipe the unlock script’s output directly into zfs create:
zfs create \
  -o encryption=aes-256-gcm \
  -o keyformat=hex \
  -o keylocation=prompt \
  "$DATASET_NAME" \
  <<< $(/etc/revaulter/unlock/$DATASET_NAME.sh)
This will trigger a Revaulter approval request, with same flow as the wrapping step, since unwrapping is just another operation required approval.
A systemd unit to unlock at boot
The last piece is a systemd unit that handles the boot-time unlock. The unit needs to wait for the network to be online (because we need to talk to the Revaulter server), wait for the zpool to be imported, and then invoke our unlock script and feed its output into zfs load-key. It also needs to be idempotent: if the dataset is already unlocked or already mounted, it should be a no-op.
# Get the systemd-safe escaped name for the dataset
UNIT_NAME=$(systemd-escape "$DATASET_NAME")

# Write the unit file
cat <<EOT > "/etc/systemd/system/mount-$UNIT_NAME.service"
[Unit]
Description=Mount ZFS $DATASET_NAME
Requires=zfs.target network-online.target NetworkManager-wait-online.service
After=zfs.target network-online.target NetworkManager-wait-online.service
StartLimitIntervalSec=0

[Service]
Type=oneshot
RemainAfterExit=true
ExecStart=/bin/sh -c 'while ! zpool list | grep $ZPOOL_NAME; do sleep 1; done; (zfs get keystatus $DATASET_NAME | grep " available" && echo "Already unlocked" || /etc/revaulter/unlock/$DATASET_NAME.sh | zfs load-key $DATASET_NAME) && (zfs get mounted $DATASET_NAME | grep yes && echo "Already mounted: $DATASET_NAME" || zfs mount $DATASET_NAME)'
ExecStop=/bin/sh -c '(zfs get mounted $DATASET_NAME | grep yes && zfs umount $DATASET_NAME || echo "Already unmounted: $DATASET_NAME") && (zfs get keystatus $DATASET_NAME | grep " available" && zfs unload-key $DATASET_NAME || echo "Key already unloaded")'
Restart=on-failure
RestartSec=2s

[Install]
WantedBy=multi-user.target
EOT

chmod 0644 "/etc/systemd/system/mount-$UNIT_NAME.service"
Then enable and start it:
systemctl daemon-reload
systemctl enable --now "mount-$UNIT_NAME.service"
When you start the unit, you’ll get a notification on your phone: approve from the passkey UI, and the dataset will mount (if you don’t get a notification, it may be because the key is already loaded for the newly-created dataset). Reboot the server and the same thing happens automatically: the unit waits for the network, makes the request, and pauses until you approve. If you never approve, the unit just stays in its starting state, and a subsequent systemctl restart or another approval kick will bring it up.
Because the unlock is a regular systemd unit, you can chain other services off it with Requires=mount-$UNIT_NAME.service and After=mount-$UNIT_NAME.service in their own units. Anything that depends on data on the encrypted volume (e.g. a database, a Docker daemon with its data root on the dataset, etc) will then wait for the unlock to complete before starting.
What this gets you
The result is a setup that, in my opinion, hits a genuinely good point on the security/convenience curve. The encryption key for the dataset is never stored on the server in plaintext form. There is no SSH session needed at boot. The key is gated behind a passkey, which is the strongest form of user authentication generally available today: phishing-resistant, hardware-bound, and not something an attacker can guess or reuse from a leak.
The transport between the CLI and the browser is End-to-End Encrypted with hybrid post-quantum primitives, so the Revaulter server itself doesn’t see anything sensitive even in transit. And because everything is mediated through a notification and an explicit approval, you also get to audit each operation.
There are trade-offs, of course. You need a Revaulter server running somewhere reachable, which is one more thing to operate (though it’s small and self-contained, and it can absolutely be hosted on a VPS or on a Raspberry Pi). The unlock isn’t instant: it’s gated on me opening my laptop/phone. And if I lose every device that has my passkey enrolled, I lose the ability to unlock the data (tip: make sure to add a second passkey and make backups of the server).
For my homelab and for several small production setups (like my Restic backups), those trade-offs are worth it many times over. If you’ve been living with one of the awkward halves of the encryption-key problem, give it a try and let me know how it goes.